Friday, 28 December 2012

Tools

primary couching!
The objects that I use when I'm stitching are all redolent of the past, linking me physically to my younger self and to my immediate female forbears.

From mum I get three things that I made for her over time; a needle case I made in primary school, in Petersfield, where we lived before Dad died. This holds my quilting needles, patiently waiting for the next time I have some free time to practice some hand quilting.

Then there is the lace trimmed needle cushion with a heart at its centre, made from a kit in a monthly needlework magazine I bought back in the eighties when such things were all the rage. It sits here with the pin cushion, which may have come from Ganna, or possibly Nanya, I'm not sure how old it is.

needles and pins cushioned

The most recent gift was another needle case I made for her from a pattern in Candace Bahouth's Medieval Needlepoint; this tends to hold a mix of mostly big needles, including tapestry needles. I made a similar one for my Aunt Cecil, which she still uses.


now which one holds the needle I need?
My white needle case which holds all my embroidery needles does come from Ganna. Most of my needles also come from several generations' collections, as do the pins. My great Grandmother (Nanya) and her family moved from Southern Ireland to Liverpool in about 1869. Family tradition has it that her father, having been a Methodist Minister, lost his faith after the death of six of his eleven children in one of the frequent bouts of childhood illness that we are, blessedly, spared in these days of modern medicine. On arriving in Liverpool, they seem to have set themselves up in the drapery business and Cecil can still remember "Aunt Annie", Nanya's youngest sister, working "the most beautiful smocking" in order to earn some money.

Many of these things I can remember sitting in the top drawer of Ganna's bookcase, along with the fabric scissors and pinking shears, several yard of bias binding in various colours, wooden cotton reels and a variety of dubious looking things that were of use in repairing fierce elastic undergarments! This bookcase drawer was the designated repository of needlework tools from time immemorial. Such are the elements of family mythologies. When I use them, they include me in this elemental connection; that of mother to daughter through generations, each passing tools to the other, gleaning the good on the way and discarding the worn out, shaped by a deep philosophy of frugality, because of the War; because of the Troubles; because we have all looked after our own in some way or other. In a very female dominated family, each generation from Nanya's mother through to me, have shared a living space when one or another had need of help, and so these things get handed down because house contents blend, rather than the sort of mass sorting and sifting that goes on when one generation downsizes moves into care of some sort, when there has to be a drastic pruning. One makes space both for loved person, and their loved things. I have no idea whose fingers these thimbles have protected in the past, but, when I use them, I know that I share a deep and indelible link, as I too ease the needle through fabric that I stitch.


Monday, 24 December 2012

Couching thoughts

It's useful to have the thread you are couching held down by a needle, especially if you're trying to couch down two threads together.for the first time!


I'm using analogous coloured thread - i.e. similar spot on the colour wheel, so that the thing that is interesting about this is the texture. I could use something from the other end of the spectrum and create a zingy contrast with, say, lime green, or a more muted effect with a warmer green.

This is just a practice piece, on a bit of scrap from Barbara's bag, but i can see that it has potential.


Saturday, 22 December 2012

Swirls seem to be a theme

These are "extracts" from some recent work at Barbara's, swirly warm up exercises to get our eye and hands and inner artists loosened up! Then we made the grid stencil, then I had homework to do with them, so this is part of my homework.

I used the grid stencil to isolate bits of each A3 image. Or, as right, to overlay the two A3 images and take from both. Blue is often my chosen colour, though the later image is in much warmer tones.

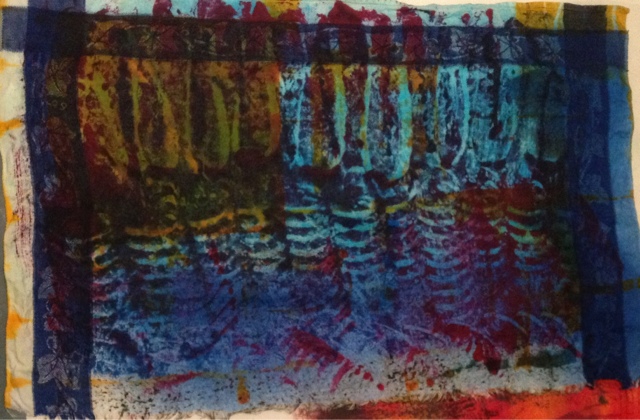
As I was doing the colour wheel exercises, which is another story, I splodged and splished the spare paint on spare paper (good advice from Barbara, don't wash it down the sink, use it to colour paper in some way), and came up with this, which I then used for the next part of the homework (I was meant to use a magazine).


Here's what happened.

I extracted some smaller areas from this image; again using the grid to bring out certain parts. There is much twisting and turning and moving about of the grid, to try and get the bits you want to see, fitted into its irregular shapes. I worked each little area up on some cartridge paper (did I mention I'd treated myself to some felt pens; recently?!)
.
I coloured my extract first in it's own colours, then in their opposite, then made a collage of it with paper from magazines. I raided some old Quilting magazines for colours. The single tree motif is from the left hand side of the image. This is the one I decided to do the most with, but I also played with the foreground image, initially sketching it out (top left) to look at the tones, then working it up to extract its basic shapes and colours, again with the felt pen (loving 'em). This might also be fun to explore

It's an interesting exercise as it encourages you to think of the image as a series of simplified shapes, which is what you need for an embroidery design.
All rather illuminating!

Friday, 21 December 2012

Couching.

Which is a word rather like couchant, which comes from the French word for lying down, which has a particular meaning for me as it appears in one of Ganna's novels, spoken about the sight of a headland, rather like. Beachy Head. This headland is in Swanage, know there as Ballard Down, I have a tinted photograph just outside my bedroom door.

The novel is called Glory Down. I have read it several times, but so long ago now I can't remember the detail. I'm off for a couple of weeks over Christmas, and might read it then.


Working notes in Ganna's handwriting


But I digress. Couching. Using stitch to apply thread, or other, to a ground material, in this case the piece I've already used for the laid work.

I had been over in Eastbourne, and wandered into the little mall beside the station, looking for things to couch down. There's a little embroidery shop there, which always has something a bit out of the ordinary. I brought my treasures home, and, unpacking them, thought to look for what else I might have tucked in a drawer or two! I came up with these.


Then I thought to look further, what else might I couch down? A piece of fabric from a dyeing experiment, some fragments of Mum's dresses from. My scrap box, a vivid bit of turquoise, all repurposed fabrics, stitched to a charity shop find damask napkin which served as ground for the laid work.


Then I started stitching down the dyed fabric and did a little what if, which I am just starting to understand after following Jude's Blog for some years now? What if I bring the needle up and put it down within the profile of the strip of fabric?


A slight ripple in the fabric, which could be exaggerated but here is just held in with some turquoise fly stitches, their tails lengthened to accommodate the narrowness of the fabric.


I also discovered one has to have a full stop, or the fabric will flip up in an ungainly way!

Here some French knots and a little nine patch to echo the one in the centre hold everything in place, and stop the fabric from fraying any further. A little bit of fray brings out that lovely contrast between warp and weft.

Here, the same technique with the same thread gives me a flower garden, and allows a bit more of mum's dress to show behind the flower fabric.

I did my best to continue the colour theme from the central piece of stitching, it must have some common theme to pull it all together, colour seems a good start.
I also try to use an elbows length of thread, as advised by Barbara, more or less, depending on the thing I'm stitching, the change colour - so what follows can contrast entirely, so long as it works with the colour theme and with what's being stitched down.n

Wednesday, 19 December 2012

Some recent experiments

I've been at another of Christine's workshop, this time working over fabrics from the previous session. We had a show and tell, three pieces from each of us that we liked, and three that we didn't know what to do with or didn't like for some reason. One piece i worked over was the red/orange floral squares. I'm loving the going in and out ness of the resulting cloth. The trick will be to integrate the edges. If they don't integrate, they can always be used elsewhere. All of the other bits of fabric have done something, As the layers develop, interesting, unexpected things start to happen and I begin to see stuff that I might be able to work with, figures emerging, swimming in fiery waves, themes unconsciously followed, like the tree of life/ankh cloth, which I'll post later, with its little primitive dancing men, the way linen and silk take up the colour differently from the reworked sheet cotton, ideas about where there is some kind of potential. We'll see! I'm quite excited!

For now they are all in the washing machine, never sure what's going to appear when they come out the other side

Oh, and the very vivid one is from the previous tray dying session that I've failed to post because I've been so busy!

I've also done my Christmas trip to Cecil, to give her the quilt. I'll post about that later too


Sunday, 9 December 2012

More organza experiments

These are kind of working notes, learning how to use the iPad as a tool to record my thoughts, and get them into an order I can use in my City and Guilds without too much grief. so, here are notes to self with illustrations I hope!! Click for bigger pictures.

While I'm stitching, I'm also working out how to catch this tender fabric down without ruining the translucent quality of the textile. There's also the direction of the grain  to consider. Sometimes, with the black piece, I had to stitch down in both directions to prevent the organza pulling out. I used two strands of thread as that seemed to be about the right weight, and I wanted to concentrate on colour without the distractions of other textures. there's enough texture in the organza. There's also very little chance of hiding the start of the stitch with each thread, so I made a feature of it, crossing the stitches and finishing on the front with a French knot to secure the initial stitches.

I rather like the tails on the back.

05/12

Now I've moved to stitching on white backing fabric. I considered using a shiny rayon thread for texture, but decided that it was adding nothing, so changed to navy stranded cotton, two strands. The stranded cotton, with its easy texture and willingness to bend makes the stitching much quicker, and is, I think, fine in this context. The glisten of the organza likes the muted, not quite black of the stitches. As the stitching progressed it developed a changing rhythm depending on the lay of the fabric. As I layered more and more on the backing fabric the stitches had to evolve, becoming one long stitch, with a tying down thread across the centre at right angles - I think it's a proper stitch of some sort, must check. I had to do this as the varying layers and overlaps couldn't be tied down using my original ordered little stitches I started with. At the end I lengthened the pieces of organza and gave them a wavy pattern, to move right away from the neat texture of the first part. My daughter sees a tulip in this bit - I just see scrumptious colour, though this image is a bit more in the blue scale than the actual fabric

9/12/12
In stitching these rectangles at right angles , I tried to reflect the colours of the organza by mixing similar colours of thread on the needle. I started with the French knots at the corners, it seems delicate yet secure, especially as I make a very short stitch first, then work the French knot over that stitch. It stops the knot being pulled through to the back of the fabric and makes the organza more secure.


I hold the twisted thread tight against the fabric with my nail whilst pulling the thread through to the back, making sure the knot part stays tight around the needle and so, neat against the fabric


The French knots worked well, but for the last one I thought a little bright pink laid work cross, tied down in the centre with a single stitch was more appropriate (trust me, I'm not normally a pink person!), as there are 11 layers altogether! I also tried to keep my backside neat - if you'll pardon me!


I realise I've not shown you the finished organza on black
I tried for  landscapey effect, with haze on the horizon and birds swirling in the neon sky! It is, after all, only supposed to be a quick sample of fabric and stitching, but it's made me smile!

Oh, and the iPad bit? In the end I had to come back to the PC as I couldn't figure out how to position the images in the text via iPad. Must be a lack in my technical knowledge!!

Monday, 3 December 2012

One and a half hours of stitching

And here's where I got to after about one and a half hours of stitching
I've done a bit more today, but now am going to allow myself to sit down with a book and read until New Tricks comes on!

Sunday, 2 December 2012

Organza layers

Some of what I brought home from yesterday's class with Barbara.
What fun!

Later in the evening I sat down and did some fiddling with the layered organza. In working with this I realised how, while you're stitching, you're figuring out how to catch this tender stuff down without ruining the translucent quality of the textile. You also have to consider the fineness of the weave, making sure you stitch down in both directions because if you don't it may pull out. I'm using two strands of thread as that seemed to be about the right weight, and I wanted to concentrate on colour without the distractions of other textures; there's enough texture in the organza. There's also very little chance of hiding the start of the stitch with each thread, so I made a feature of it, crossing the stitches and finishing on the front with a French knot to secure the initial stitches. I rather like the scribbly tails on the back.


Choosing threads and matching them with the colours of the organza. My lovely thread drawers make this so easy as they are small enough to put on the table with the fabric to see which colours work best.

Then pinning and stitching with a fresh needle for each colour and a delightful muddle of threads in the top right corner as I try to keep them out of the way. The other issue was turning the fabric so my thread didn't catch on all those pins!

I shall do some more today. Barbara chose us a lovely selection of organzas to use for experiments in colour blending using translucent fabrics. I've got some white background fabric to use as well. We also had some fun with glazing colours over each other with acrylic paints