I'm sorry, I have failed entirely to keep up with showing you what I've been doing for my City and Guilds. In part that's because I've been so busy doing something or other textiley, but also because I've not managed to take photos in natural light as it has been dark by the time I've got home from work and got what little brain I have in gear! So, time to make amends.


We've been concentrating on shape; doing design exercises where we take shapes and "explode" them by cutting them up and arranging the pieces to see how this distorts things. Playing with circles and squares, flipping, rotating, cutting in different patterns, or drawing patterns on the black paper with a silver pen, then cutting the paper and rearranging. I took one if the negative shapes left from cutting out a circle and pasted some uneven strips behind it. It reminds me of the moon seen through grass stems.


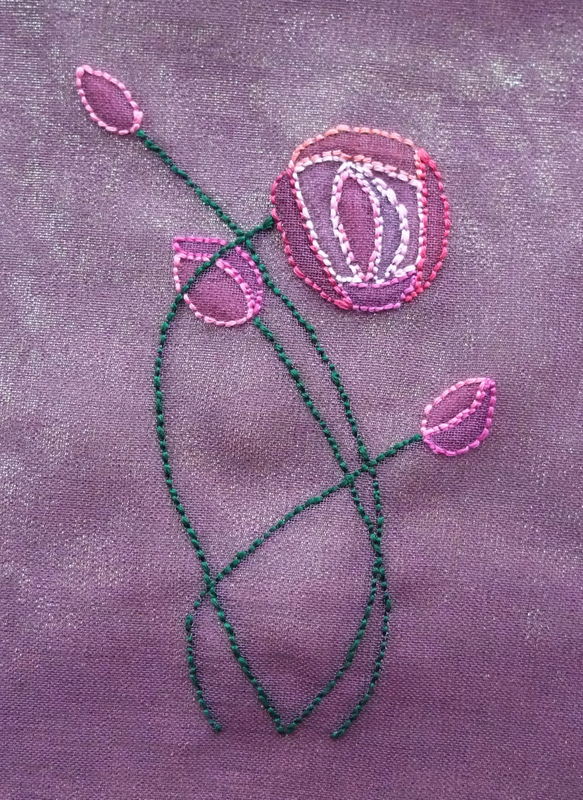
From shape, you get to shadow work; using sheer fabrics and strong coloured threads to outline a shape and have a softer colour in the center. You achieve this by stitching herringbone on the back of the design - the little back stitches that are created outline the shape, while the herringbone shows through to the front of the fabric because it is sheer. My first attempt was pretty shabby, so I shan't show you! I then thought I'd see what happened if I used a darker fabric with lighter threads to stitch with. Found a little design I did years ago based on Mackintosh's roses, and off I went.
I'm rather pleased with the result. I've backed it with gold cloth - you can see it shining through here, and will work two lines of close satin stitch with the machine, then cut back to the gold in between to create a frame. That will have to wait until the work has been assessed though, as we have to make the back available for inspection!
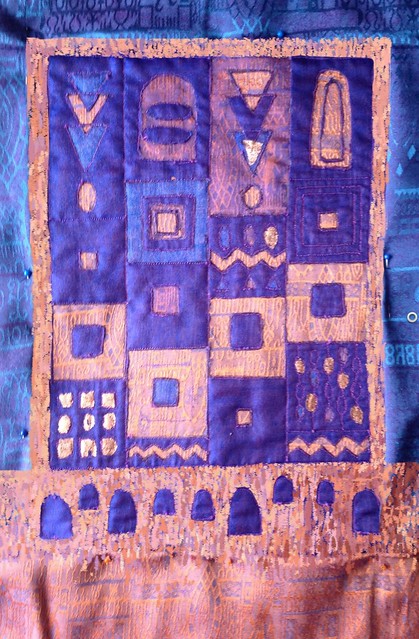
Then I did a bit more, this time combining shadow work, couching and Point Turc and Paris Stitch. Instructions for both of these can be found
here. Both stitches leave fine holes in the fabric, where as you stitch, you pull the thread tight to draw the threads of the fabric together. You often see them on fine lacy handkerchiefs or baby clothes and they are used to either applique one fine fabric to another, or as a decorative hem. I've used them here to attach the strips of fabric in the top half, to stitch round the "sun" in the center and at the horizon line. On the lower half of the design I've worked the herringbone stitch on the surface of the fabric this time, to represent waves - along with some threads couched down and some that are slotted between two rows of stitches so they lie between the layers of sheer muslin with the colour showing through. There are 9 waves; I had in mind the Irish legend of the
Isles of the Blessed, which lie beyond the ninth wave. If you click on the photo to enlarge, you might be able to see the sprinkle of fairy dust just below the horizon!
Next we had a session on machine embroidery. If you're following, you'll have seen the work I did at
Wendy Dolan's class. I'll be using this as one example, but I also did a little picture combining layering organza and machine embroidery. This came from my watching the fields go by on my recent trips up to London. There was a lovely haze in the air on both days, and the landscape layered away into the distance with trees silhouetted in the moist, chill air. You'll notice a similarity of colour between this and the Ninth Wave piece - I only have so many bits of blue organza to choose from. I used
Mistyfuse to attach the organza to the base fabric to stop it fraying at the edges; it does make the fabric a bit stiff to handle, which is fine for machine embroidery, but which might be annoying if you were hand stitching. I'll have to experiment! I'm not sure the colours of the stitching work quite the way I intended, but it was an trial and I'm pleased with the way it turned out. You can't see the shimmer of the organza in this picture, but as the light catches it at different angles it shimmers.
I also did another piece of machine stitching, using the nine patch again as a the basis for the design. I like the way it is both regular and uneven, working with the number three, which is symbolic in many human cultures. It also allows one to work variations on a theme, this time using rows of straight stitching and vermicelli stitch for the outer squares and granite stitch in the center. I combined single and multi-coloured threads to see what the effect is of using each. Again, I'm pleased with the results, though they are still very amateur; I found the most important thing to remember was to breathe! You also find that as you tense up when trying to control your wayward hands, the patterns tend to stray and the machine gets faster and faster as your foot presses down on the foot pedal! I used a neutral variegated thread to outline the squares and give definition to the image.

I would like to combine this with organzas underneath, it might create some quite lovely effects - I'm thinking of something based on Moorish tilework, where the regularity of the pattern would allow the sheen and sparkle of the organza to shine.
Oh for more hours in the day!